At the top of the Map details page there are more menu items which we are are going to explain in this section.

Saving a map
You can create a new map from the existing view by clicking Save > Save As... A new popup window will open.
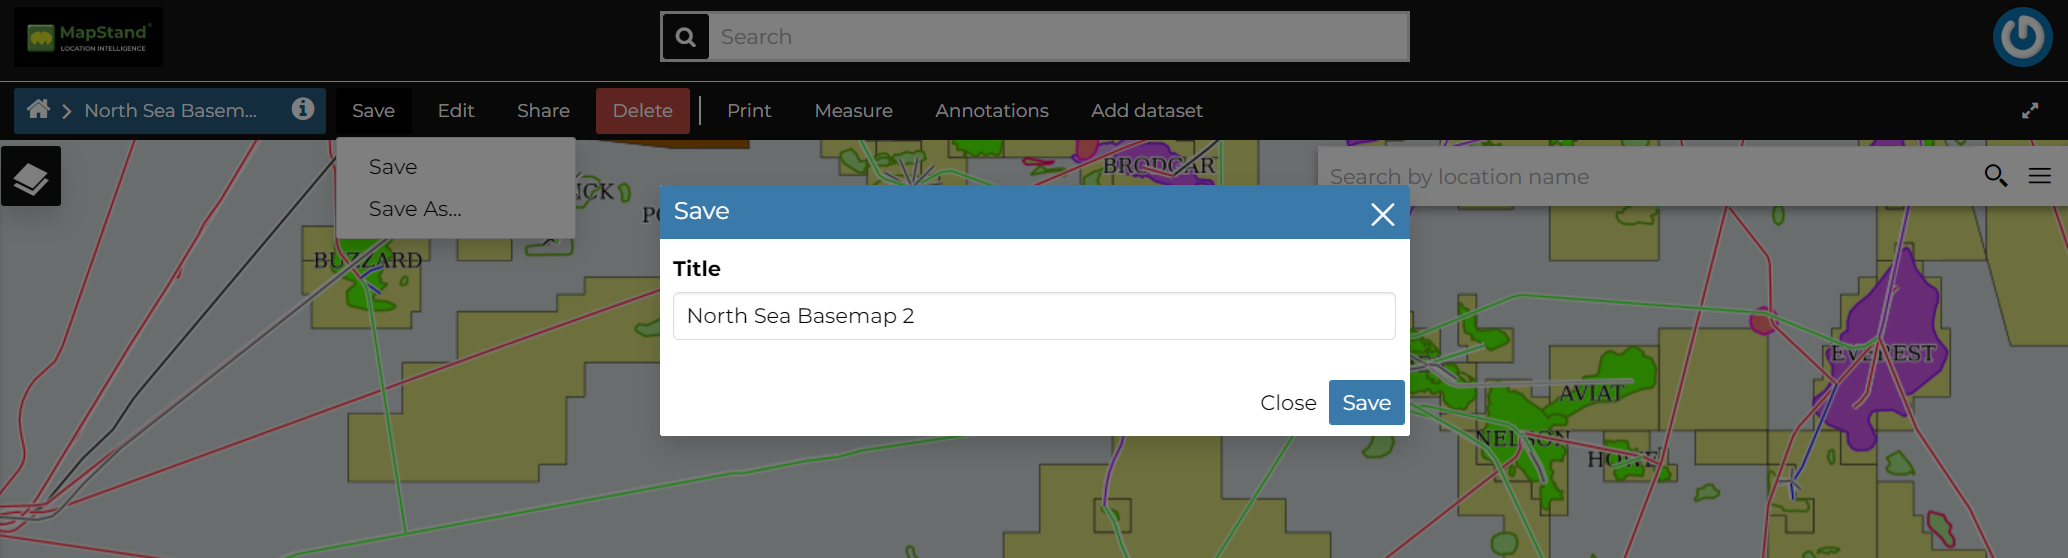
The current map title is filled by default, You can change it to the preferred naming then click on Save. The page will reload and your map should be visible in the Finding Data list.
Printing a Map
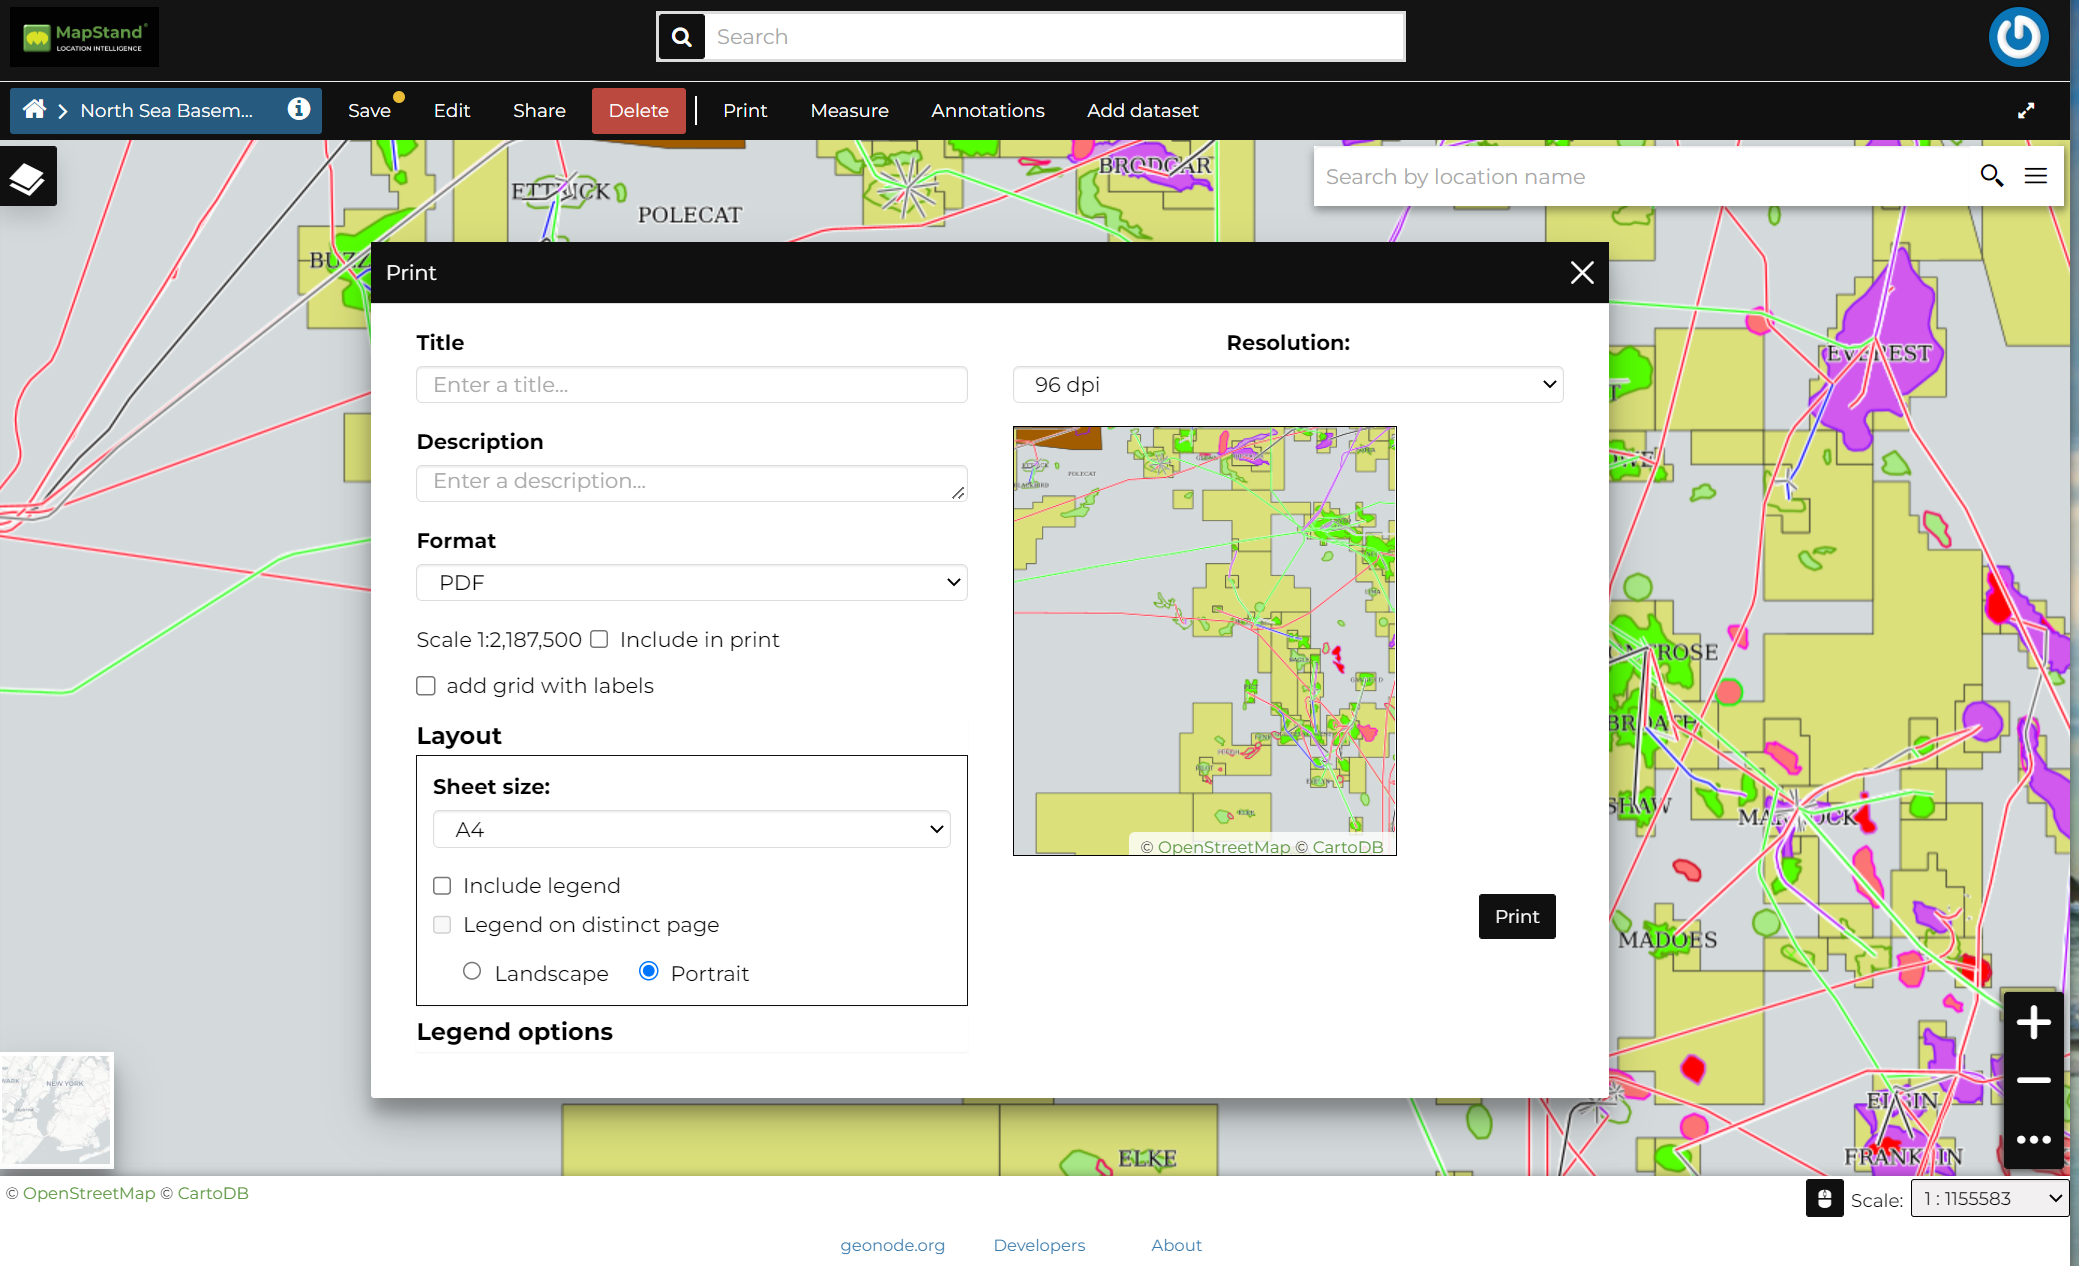
From this window you can:
-
enter Title and Description;
-
choose the Resolution in dpi;
-
customize the Layout
-
the Sheet size (A3, A4);
-
if include the legend or not;
-
if to put the legend in a separate page;
-
the page Orientation (Landscape or Portrait);
-
-
customize the Legend
-
the Label Font;
-
the Font Size;
-
the Font Emphasis (bold, italic);
-
if Force Labels;
-
if use Anti Aliasing Font;
-
the Icon Size;
-
the Legend Resolution in dpi.
-
To print the map click on Print.
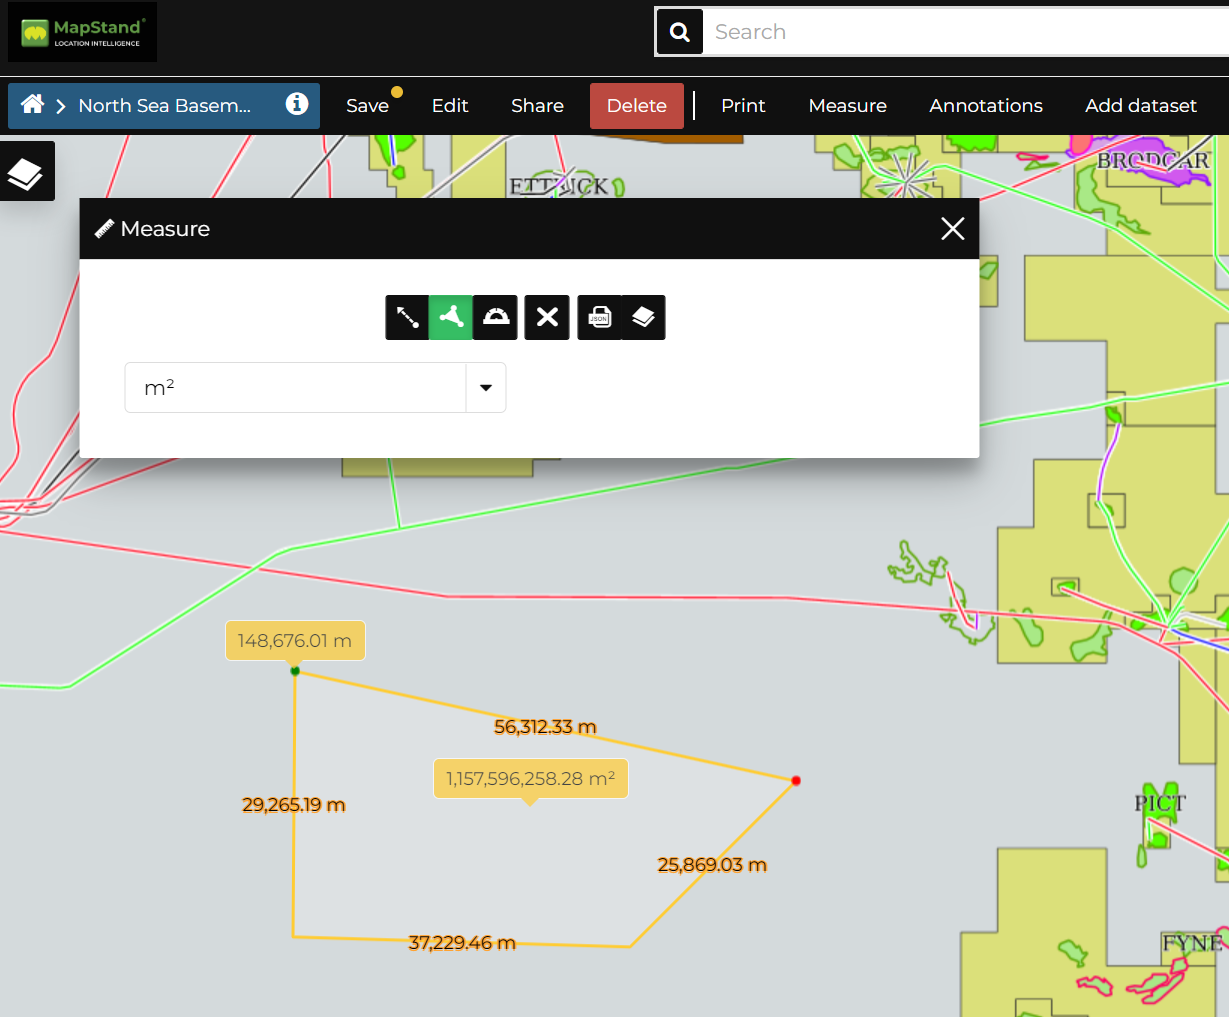
Performing Measurements
Click on the Measure option of the Menu to perform a measurement. As you can see in the picture below, this tool allows you to measure Distances, Areas and the Bearing of lines.
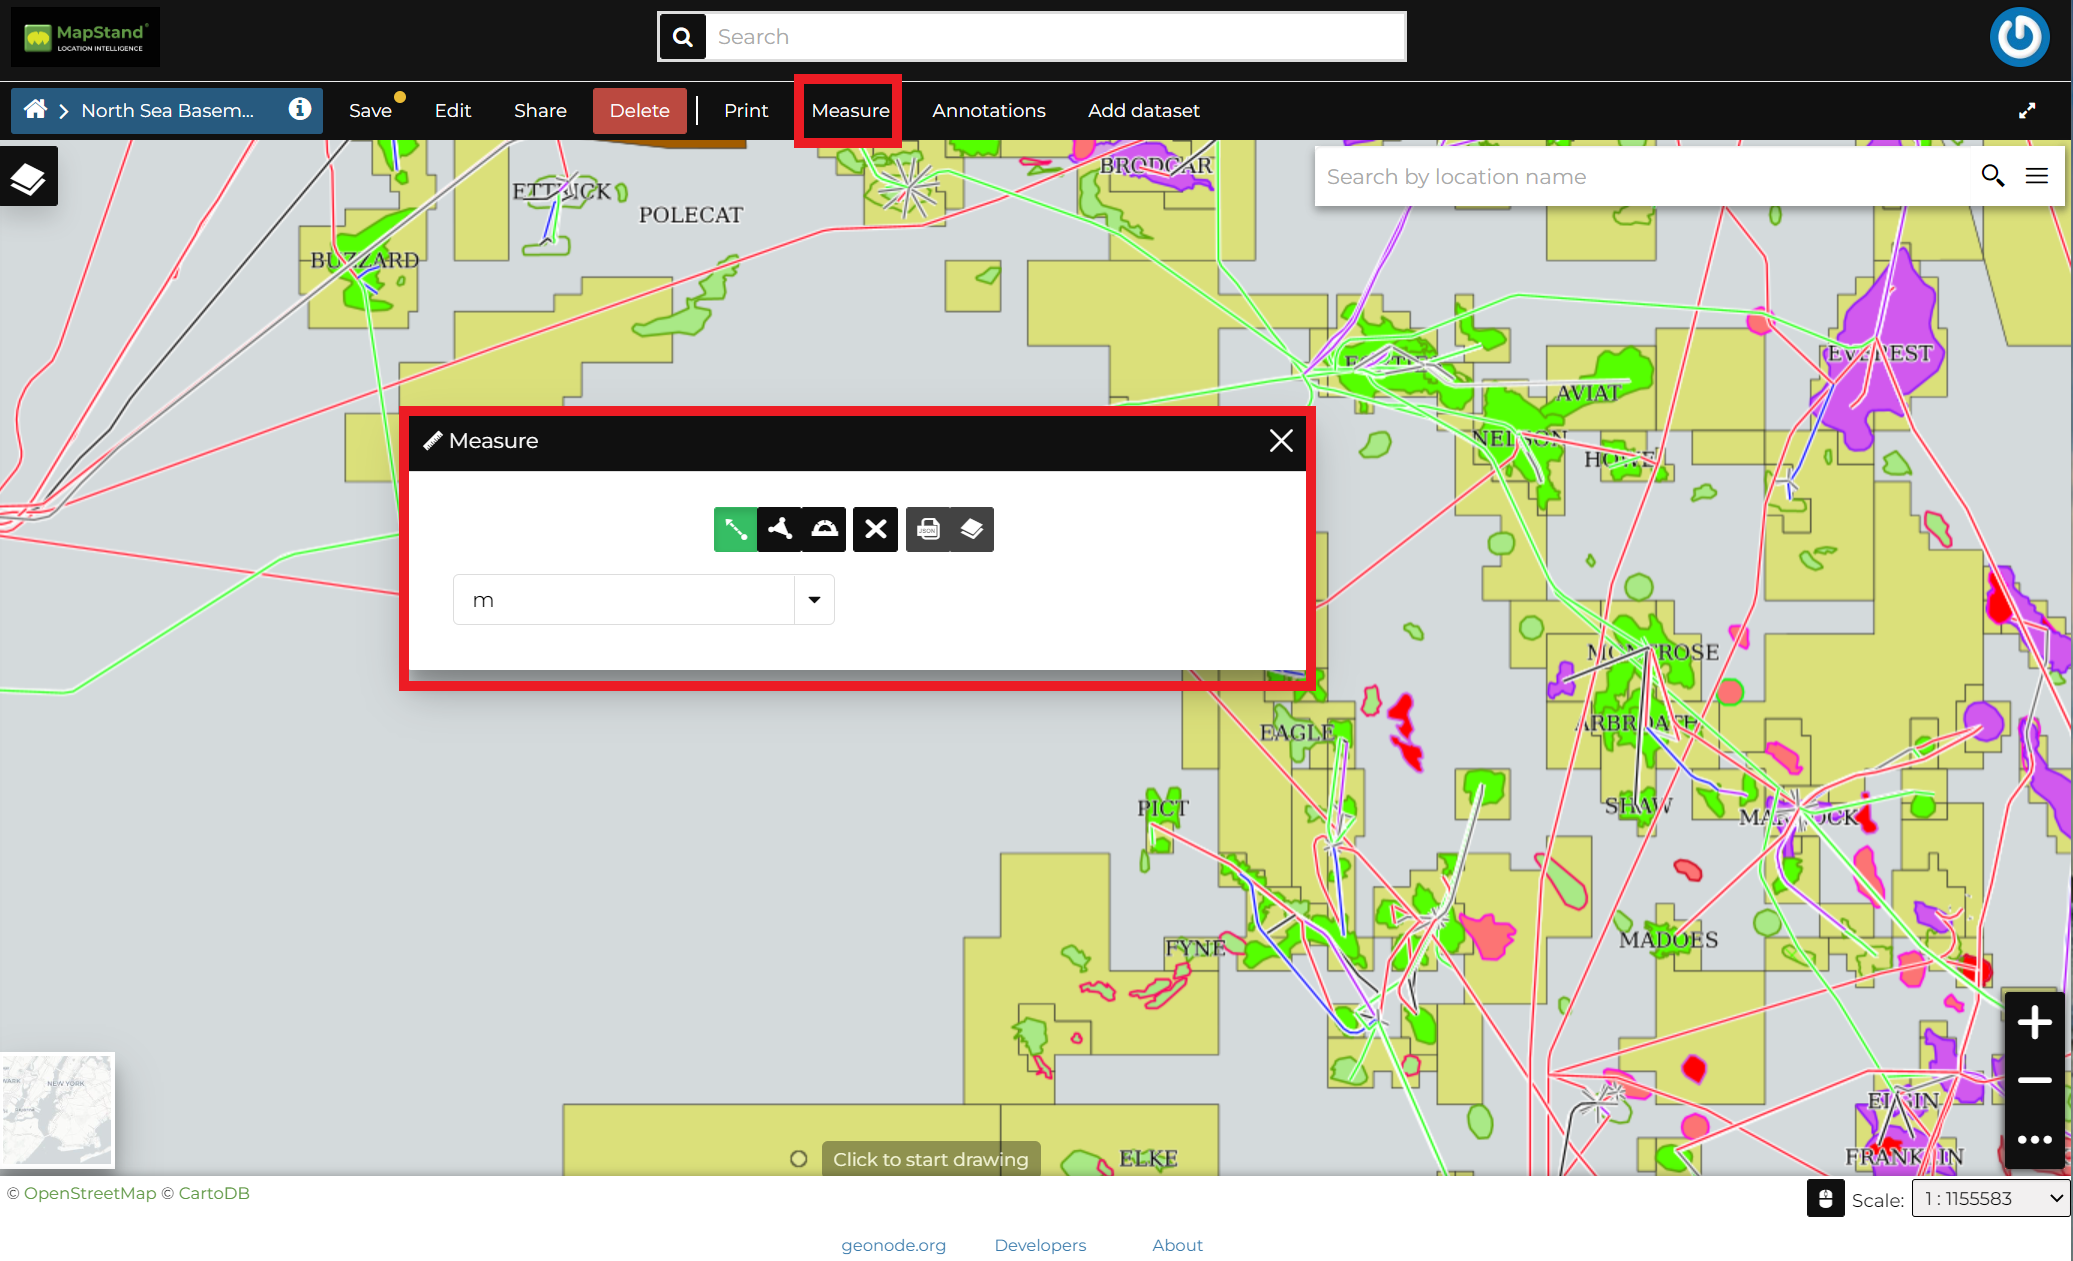
To perform a measure, select the type of measurement you wish to make (distance, area, bearing). Then draw on the map the geometry you are interested in (double click to end) - the result will be displayed at the mid point of the item drawn.
Annotations
Annotations can be manually added to a Map in MapStand HUB via the Annotations option on the Menu. A geometry can also be added to/associated with the annotation.
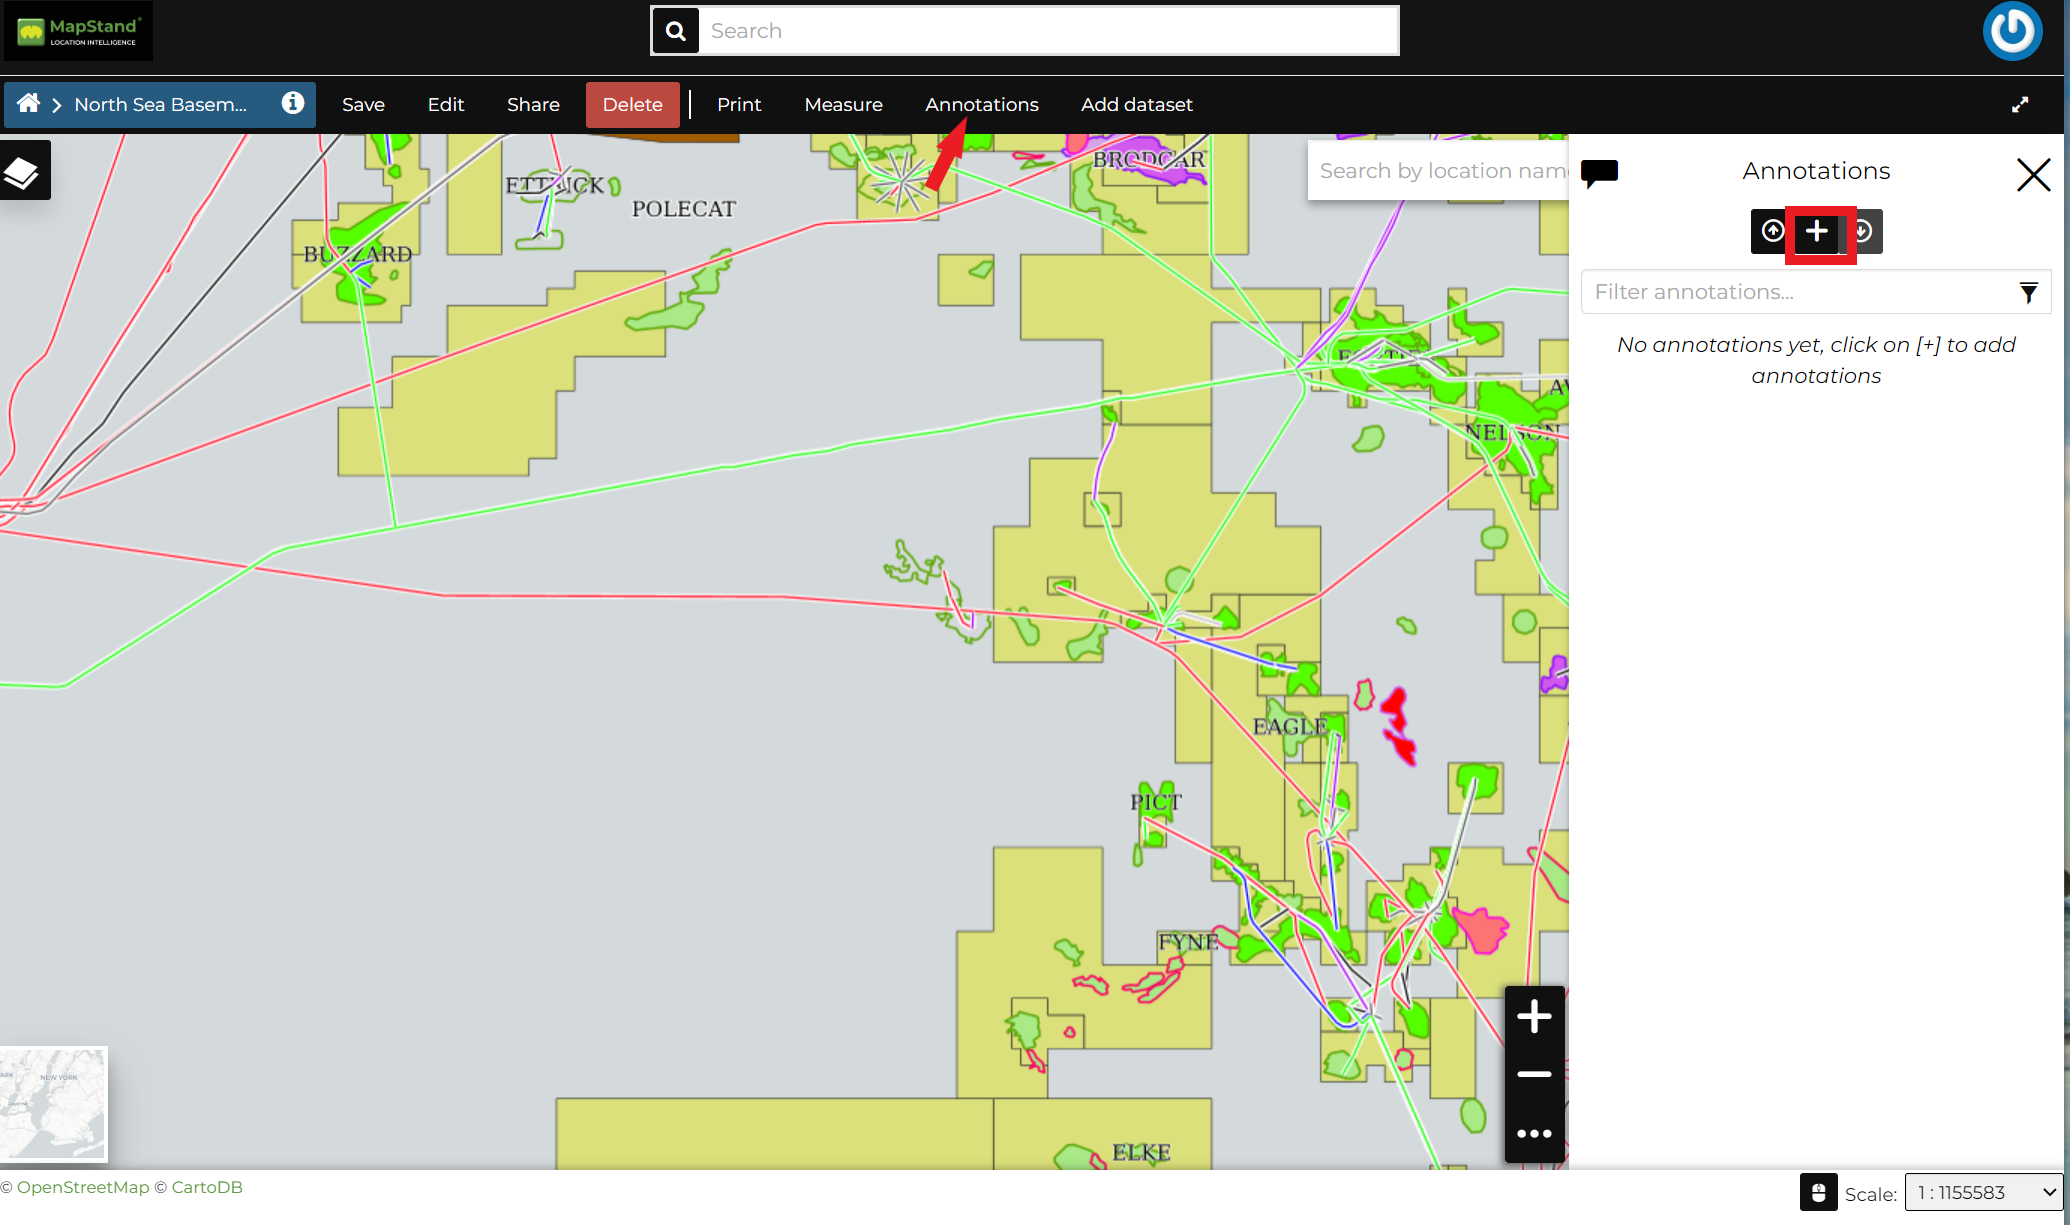
To add a new annotation, click on the + symbol. First, add a Title and a Description for the annotation. Then add a geometry - point, line, polygon or circle. You can also add the text you want to appear on the map.
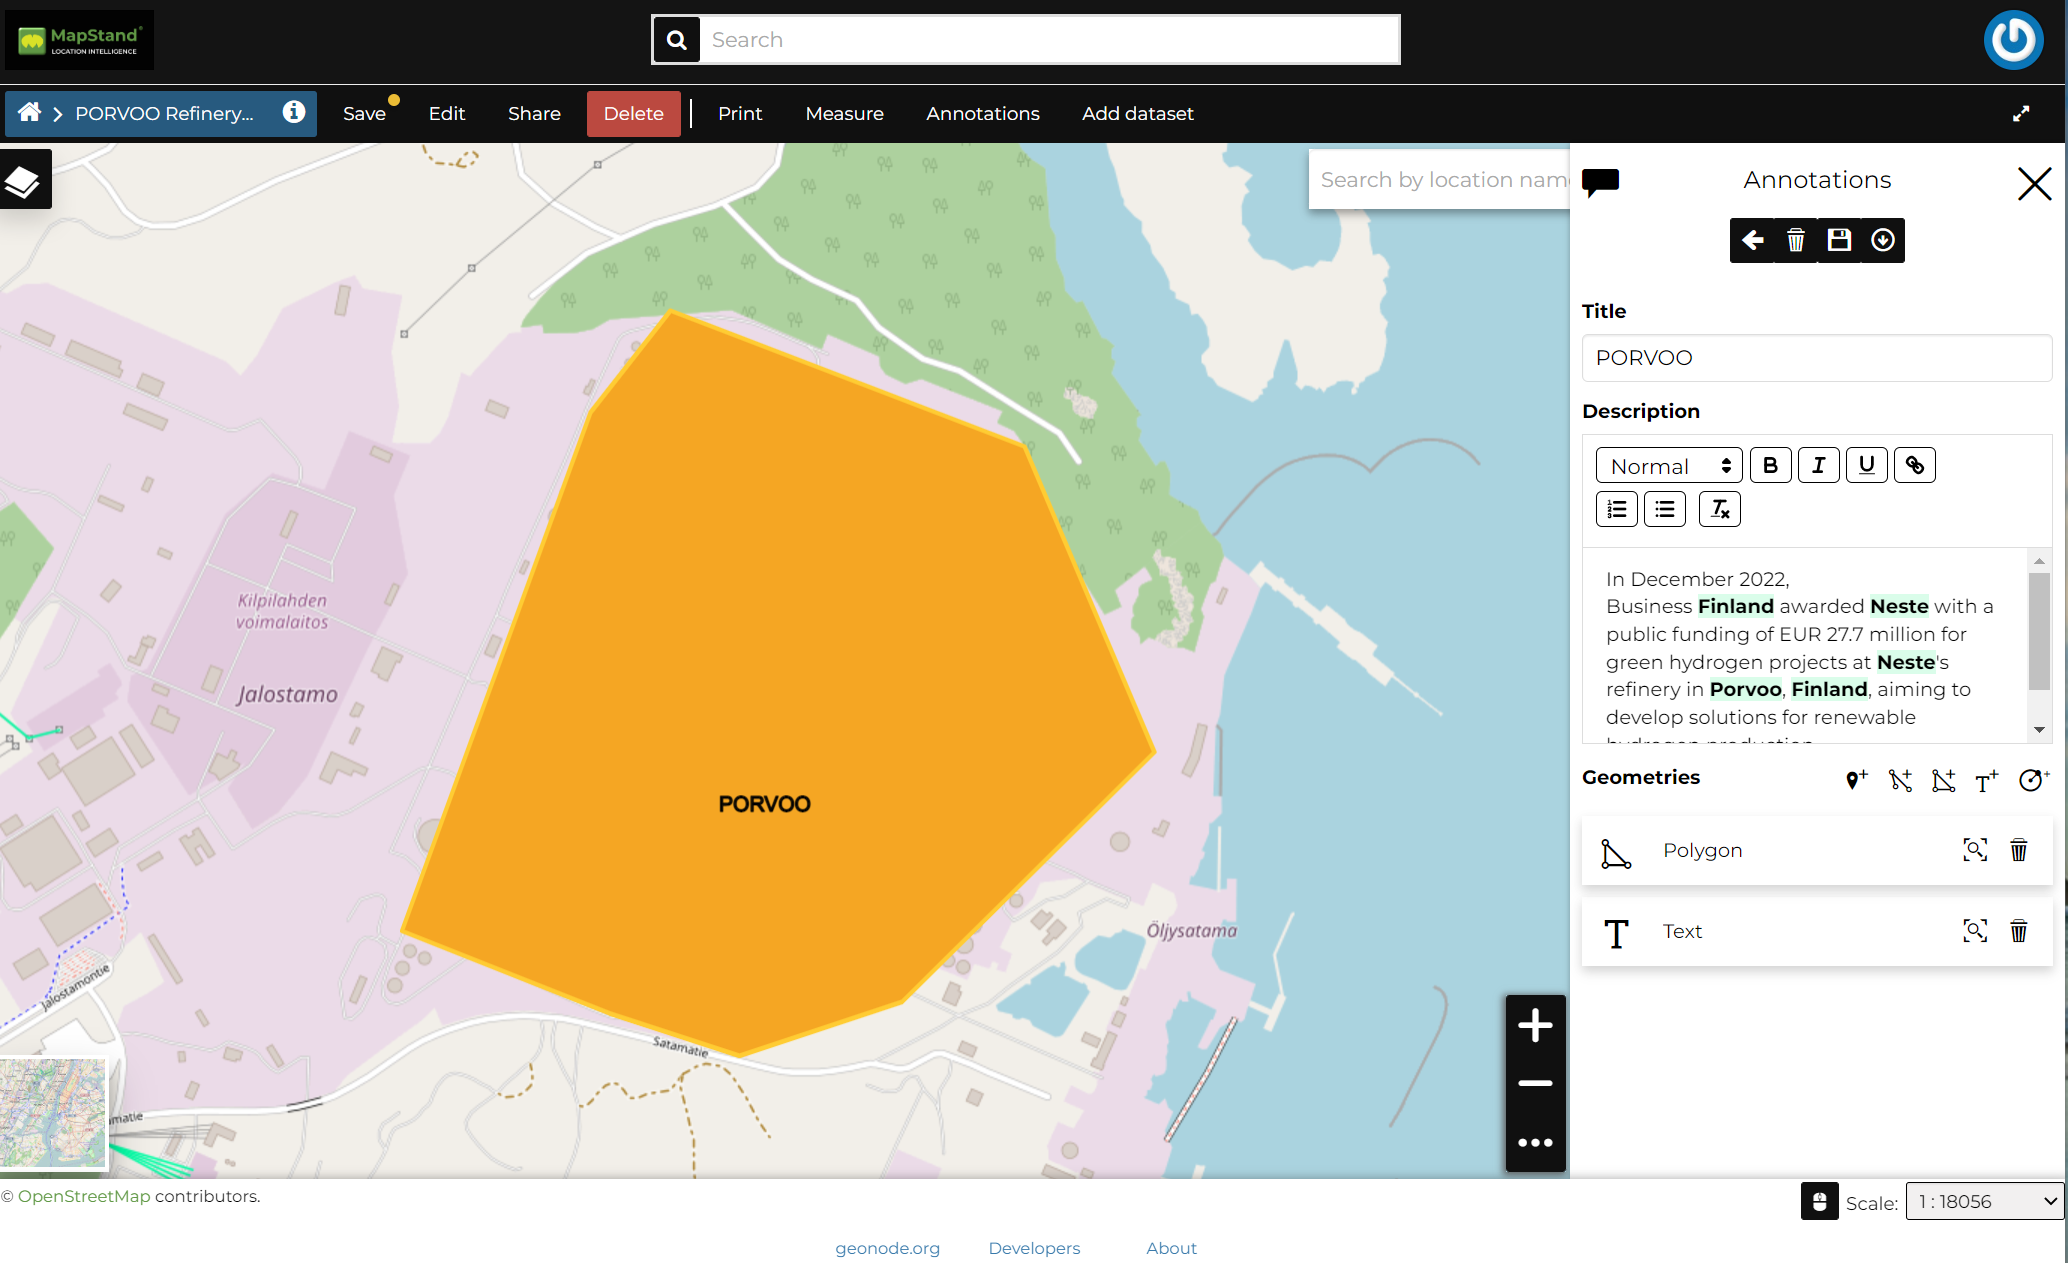
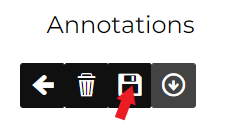
To save the annotation, click on the Save icon. The annotation you just created will also be listed in the map's Table of Contents (TOC)
If you want to edit the annotation in future, simply click on the Annotations option on the Menu and click on the annotation you wish to change.
Annotations can also be imported and exported as JSON files.
Add datasets (from the Catalog)
All the datasets available in MapStand HUB, both uploaded and remote, can be loaded on the map through the Catalog. Click on the Add dataset option of the Menu to take a look at the catalog panel.

You can navigate through datasets and look at their Thumbnail images, Title, Description and Abstract. Click on Add To Map to load a dataset into the map, it will be also visible in the Table of Contents (TOC).